Collision Avoidance with Radar
RadarHow radar supports collision avoidance under COLREG: the radar duties in Rules 5, 6, 7, 8 and 19, set-up, CPA/TCPA limits, choosing avoiding action, trial manoeuvres, checking it works and when to resume course. It is the heart of the Malta radar management-level assessment and of every rules-of-the-road oral.
Last reviewed 1 Nov 2026 · From a professional captain's years of study notes · Organised with AI and checked against current regulations · How we write
On this page (13)
Radar in the COLREG
In short: five rules make radar part of collision avoidance. Learn Rules 1–19 well enough to explain them, not just recite them.
- COLREG Rule 5 — look-out: every vessel, at all times, by sight and hearing (good 7×50 binoculars) and by all available means — radar included — to make a full appraisal of the situation and of the risk of collision.
- COLREG Rule 6 — safe speed: a list of factors for all vessels, plus extra factors for vessels with operational radar.
- COLREG Rule 7 — risk of collision: long-range scanning for early warning, and systematic plotting or equivalent observation of detected objects.
- COLREG Rule 8 — action to avoid collision: early, substantial, seamanlike.
- COLREG Rule 19 — conduct in restricted visibility.
- Know Rules 2 and 3 as well (responsibility; definitions).
- At management level you must judge both the integrity (how the data were processed) and the reliability (how accurate they are) of radar collision-avoidance information.
Rule 6 — the two mnemonics
| For all vessels — “VD Make Little Willies Drip” | Extra, with radar — “Charlie Carr eats pie no more” |
|---|---|
| Visibility | Characteristics, efficiency and limits of the radar |
| traffic Density (including fishing vessels) | Constraints of the range scale in use |
| Manoeuvrability — stopping distance, turning | Effect of sea state, weather and interference |
| background Lights at night | Possibility that small vessels and ice are not detected |
| Wind, sea, current, nearby hazards | Number, location and movement of vessels detected |
| Draught against available depth | More exact assessment of visibility |
On the bridge
- In fog the radar is often your first warning of another vessel — and Rule 6 then asks: is my speed safe for what my radar can and cannot show me?
- In the oral, describe an approaching vessel in order: type · length · aspect · special circumstances · underway · making way — then say: “I take a series of compass bearings to determine if risk of collision exists.”
Scanty radar information
In short: one or two echoes tell you nothing about a target’s course. Never decide on them.
- COLREG Rule 7(c): assumptions shall not be made on scanty information, especially scanty radar information.
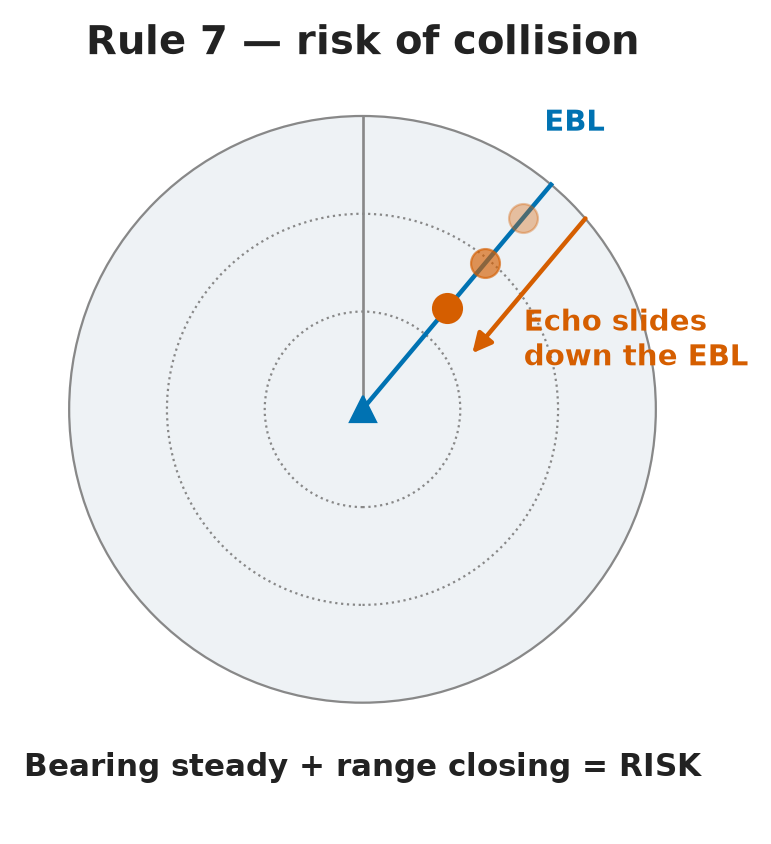
- A single position shows where the target is, not where it is going. The next plots may show it is moving away — or straight at you.
- With three plots you can see whether the track is steady or changing.
- COLREG Rule 7(a): if there is any doubt, risk of collision is deemed to exist.
- A steady compass bearing with decreasing range = risk of collision. A changing bearing does not always clear it — with a large vessel, a tow or at close range, risk can still exist (COLREG Rule 7(d)).
Exam trick
- A Transport Malta examiner may show you one plotted point and ask what the target is doing.
- ✅ Answer: “Scanty information — I need more plots before I decide.”
Setting up the radar for collision avoidance
In short: collision avoidance is ship against ship, so the picture must be referenced to the water, not the ground.
- Sea-stabilised — inputs from gyro and log (speed through the water). The target’s true vector then shows its heading through the water, which gives you its aspect — and so which rule applies.
- Relative motion — the relative approach (OA) shows at once whether the target will pass close. When you alter, the effect shows immediately.
- North-up (matches ECDIS) or course-up (matches the view from the window). Head-up is unstabilised — the picture spins with every yaw — avoid it.
- Memo: navigation → true motion, ground-stabilised · anti-collision → relative motion, sea-stabilised.
- SOG for navigation, STW for collision avoidance. Ground-stabilised mode in a current distorts the target’s aspect — dangerous for anti-collision.
- ARPA can mix true and relative trails and vectors (for example relative vectors with true trails). Use the combination you can justify.
Operator technique — gain, pulse length and weak echoes
- Gain up to find small targets; gain down when measuring a target’s range and bearing.
- Pulse length follows the range scale: short pulse on short scales (about 0.5–3 NM) for frequent, detailed updates near the coast, long pulse on long ranges. It changes automatically; a manual override exists.
- A weak, small echo is not a false echo until proven so — when in doubt assume it is real and raise the gain to confirm (COLREG Rule 7(c): no assumptions on scanty radar information).
- Know the tuning/detuning dos and don’ts that help to show a radar SART.
- Head-up gives a relative bearing scale (on some sets 010, 020… / 350, 340…), and the radar drops to head-up by itself if the heading input is lost.
- On the bridge: a Master who finds every target tracked by AIS only and none by ARPA will not be pleased. ARPA is your own radar’s plot (sea-stabilised, relative); AIS is the other ship’s GPS (ground-stabilised COG/SOG). Compare both, rely on ARPA.
- Good picture quality is the base of every decision: the team leader keeps the bridge team working the radar to procedure.
What to switch off
- Remove the ENC overlay for collision avoidance: it adds clutter, and it may carry a GPS error, so a ship echo can be mistaken for land.
- In ground-stabilised true motion, the other ship’s vector seems unchanged when you alter — not wrong, just harder to read.
Where the target data come from
In short: radar does four jobs in collision avoidance, using four sources of target data. ARPA (target tracking) is the primary one.
The four jobs of radar
- Detect vessels early → early warning of risk.
- Get their motion data (plot, TT/ARPA, AIS, TT–AIS association) → assess the risk and act.
- Check the other vessel’s actions and the effectiveness of both ships’ actions.
- Decide when to resume course and speed, passing at a safe distance.
The four sources
| Source | Gives you | Strength / weakness |
|---|---|---|
| TT (ARPA) | Range, bearing, course, speed | Primary approach — independent detection, automatic, many targets, reliable |
| AIS | Type, position, heading, course, speed, nav status, destination | Fast, gives the name — but relies on the other ship’s GNSS |
| TT–AIS association | One merged target | Optimal, less redundant information |
| Manual plot / systematic observation | CPA, TCPA, true motion | Slower, fewer targets, less accurate |
- A plot or ARPA gives 7 items: CPA · TCPA · BCR · BCT · target course · target speed · aspect.
- ARPA shows first data after about 1 min; for reliable data allow about 3 min. AIS gives everything almost at once — but it is someone else’s data.
- Modern radars flag dangerous targets in red automatically, even before you acquire them.
Why ARPA, not AIS
- ARPA builds the triangle from your own sensors, under your control and maintenance.
- AIS repeats the other ship’s GPS and static data typed in by a person — errors are possible.
- A dead ship may have no AIS, but radar still shows it and you can plot it.
- AIS is still useful: fast data and the ship’s name if you need to call.
Is there a risk of collision? CPA and TCPA limits
In short: set a CPA limit and a TCPA limit, then sort every target into one of three boxes.
| CPA | TCPA | Verdict |
|---|---|---|
| More than CPA limit | any | Not dangerous |
| ≤ CPA limit | More than TCPA limit | No immediate danger — watch the TCPA |
| ≤ CPA limit | ≤ TCPA limit | Dangerous — decide and act |
- The CPA limit is your guide: want 1 NM? Act on anything that will pass closer than 1 NM.
- Examples: limit 1.5 NM, target CPA 0.9 NM → a small alteration and done. Limit 1 NM, target CPA 0.1 NM → a major problem.
- Set a minimum BCR (bow crossing range) too — increase it for large ships, tows and at close range.
- Situations keep changing → keep identifying them: uninterrupted look-out, information from the targets, bridge team working together.
Taking avoiding action
In short: act per COLREG Part B (Rules 11–19), act early, and make it big enough to be seen.
- Actions must comply with COLREG Rules 11–19.
- Real life is rarely one against one: crossing, overtaking and head-on at once, usually at night or in poor visibility. Plan a series of actions, ranked by each target’s CPA and TCPA.
- COLREG Rule 8: the alteration must be readily apparent — not 1–2°, but no need for 90° or 180°. Show your intention clearly, especially as the give-way vessel.
- COLREG Rule 8(e): you may also slow down, stop or reverse.
- The cost of delay: plots at 08:00, 08:06 and 08:12 → acting at 08:18 instead of now needs a much bigger alteration. A few degrees in good time avoids 20–30° later.
- Stand-on vessel and the other does not act → COLREG Rule 17, and remember Rule 2.
Overtaking — COLREG Rule 13
- Overtaking = coming up from more than 22.5° abaft the beam.
- Any vessel can be the overtaking vessel — even a sailing vessel overtaking a power-driven one.
- In doubt, assume you are overtaking (COLREG Rule 13(c)) — err on the side of caution.
The trawler case
- A trawler (green over white) crossing, showing her starboard side, shooting nets astern.
- COLREG Rule 3(d): “engaged in fishing” = nets, lines or trawls that restrict manoeuvrability. Only trolling lines are excluded — so a trawler is a fishing vessel and you keep out of her way (COLREG Rule 18).
- Options: take a series of compass bearings · never cross close astern (nets of unknown length) · a round turn · alter to starboard, run parallel and pass astern at a good distance (or ahead if you are much faster and clear) · take all way off and let her pass.
The picture can change
- The other ship may lose steering or power, or have a fire → she becomes NUC, top of the COLREG Rule 18 list → keep monitoring.
- A vessel can run aground — her lights will change to show it.
What not to answer
- “I’ll call him on VHF” is not a collision-avoidance answer in the exam: it is not in COLREG, and MCA guidance warns of misunderstandings and lost attention (MGN 324 (M+F)). In practice many ships call — AIS gives the name — but early action makes it unnecessary.
Restricted visibility — COLREG Rule 19
In short: no visual contact = your most dangerous time. There is no stand-on vessel: both ships must act. Slow down and create distance.
- First actions when visibility drops: reduce speed, inform the Master, post an extra look-out (AB or deckhand), engines ready.
- A typical Master’s standing order: call the Master when visibility falls below 3 NM and put the engines on standby.
- COLREG Rule 19(b): engines ready for immediate manoeuvre — tell the engine room at once (a ship on heavy fuel may change over to diesel).
- COLREG Rule 19(c): apply Section I with due regard to the conditions. No visual compass bearings in fog → systematic radar observation.
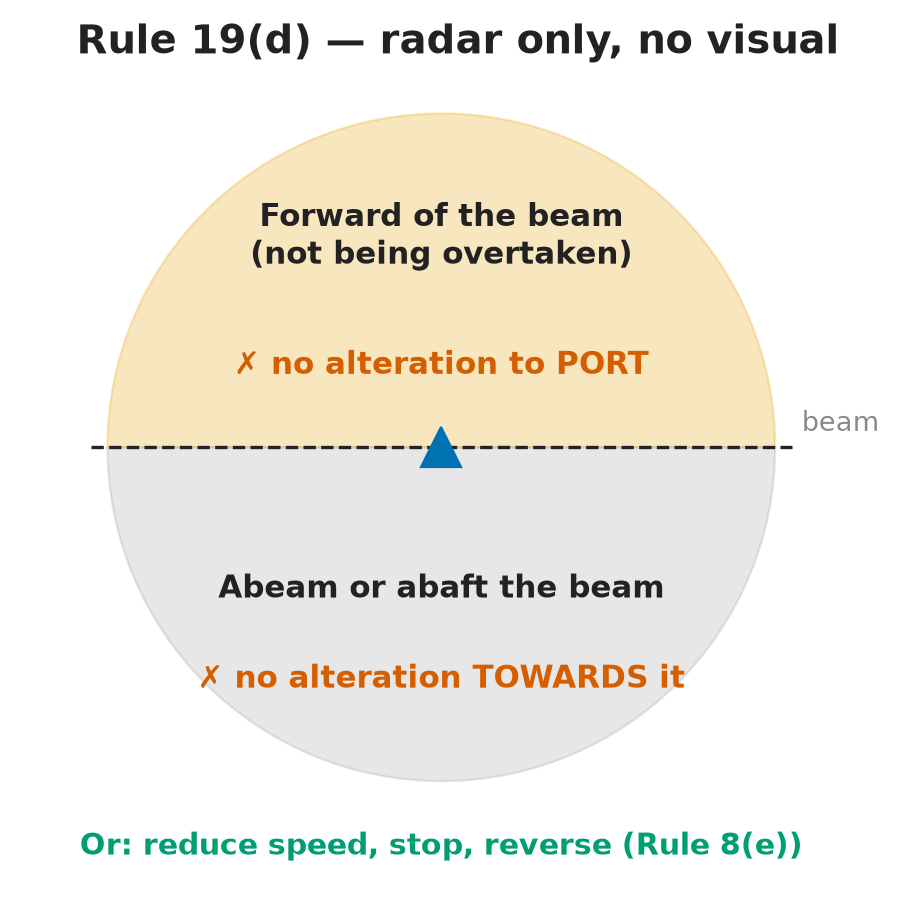
- COLREG Rule 19(d) (target detected by radar alone): decide if a close-quarters situation or risk is developing, and if you act:
- avoid altering to port for a vessel forward of the beam (except one being overtaken);
- avoid altering towards a vessel abeam or abaft the beam.
- COLREG Rule 19(e): fog signal heard forward of the beam, or close quarters forward of the beam cannot be avoided → minimum steerage speed, take all way off if needed.
- Options: alter to starboard, reduce speed, stop or reverse (COLREG Rule 8(e)), or a mix. Always ask: “Where can I go to create distance?”
How slow is slow?
- Container ships doing 22 kn come down to 6–7 kn in North European fog banks.
- Better to arrive late than not to arrive — hold your ground with owners and charterers.
- In collision situations the safe exam answer always includes “reduce speed”.
Two readings of “abaft the beam”
- One view: under Rule 19 treat any target abaft the beam as the abaft-the-beam case.
- The other: use the Rule 13 overtaking arc (more than 22.5° abaft the beam).
- The point is debated — read COLREG Rule 19 itself and be ready to justify your answer.
Exam-style case
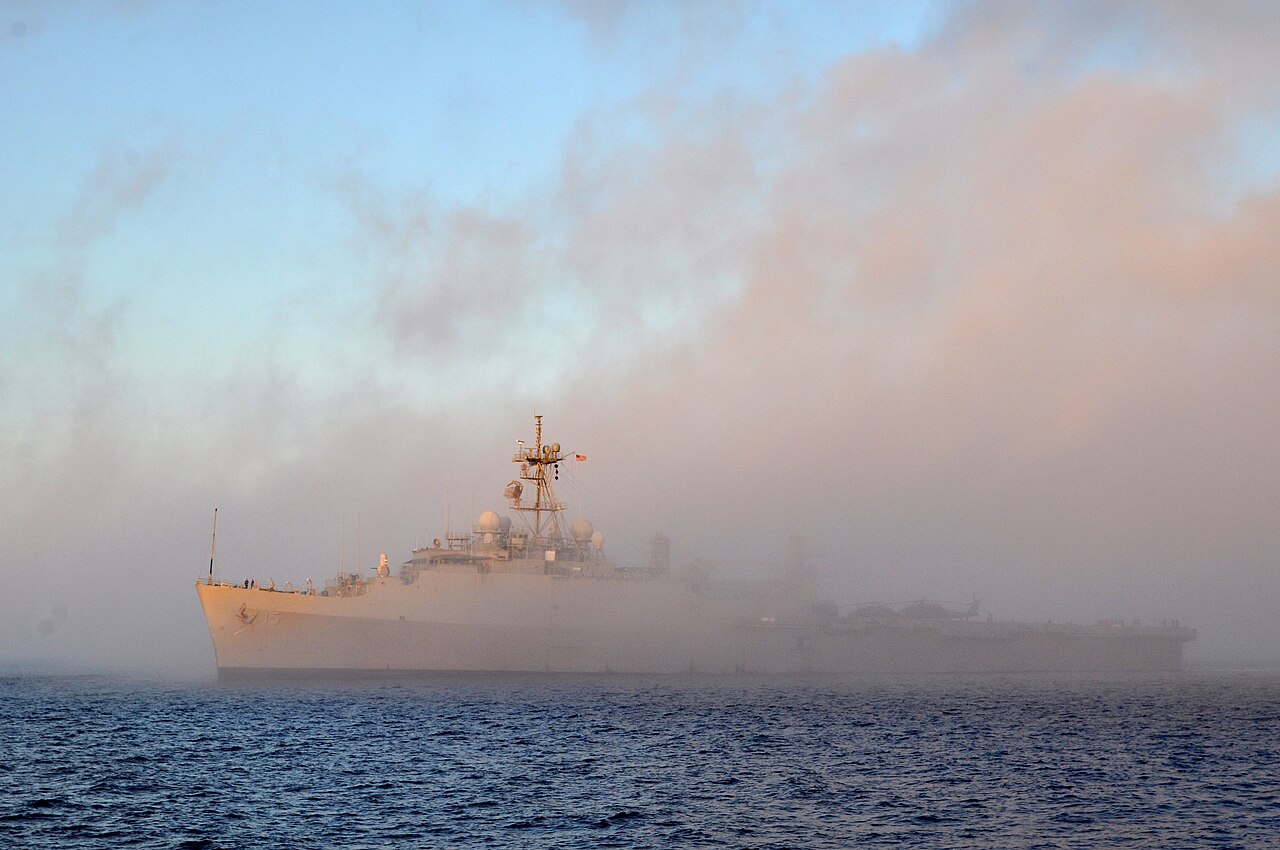
- Dense fog, narrow channel, container ship 2.5 NM ahead, CPA 0.8 NM, no reply on VHF.
- ✅ Reduce speed and prepare to take avoiding action.
- ❌ “Head-on” in the option is irrelevant (it only tells you the target is ahead) · maintain course and speed · increase speed and overtake to starboard (you are not overtaking).
Coordinated action and the trial manoeuvre
In short: both ships may act. Make sure the two actions add up, and test yours before you commit.
- Coordinated action = own and target changes produce the same change in the relative motion line → the CPA increases.
- If the two changes push the relative line opposite ways, they can cancel out — or make things worse.
- Verify with the trial manoeuvre and, if time allows, a manual plot.
Trial manoeuvre
- An ARPA function that simulates a proposed course and/or speed change and shows the resulting CPA and TCPA before you act.
- It ends when you stop it manually, or automatically after a set time.
- Use it twice: to choose the action, and later to check when it is safe to resume.
Checking effectiveness and resuming course
In short: an action is not done when you put the wheel over. Watch it work until the target is past and clear, then come back gradually.
- COLREG Rule 8(d): check the effectiveness of the action until the other vessel is finally past and clear.
- Three tests of an effective action:
- It complies with COLREG.
- It is visible to the other ship — by eye or by radar.
- The ships pass at a safe distance.
- Safe distance allows for interaction, yaw, a sudden sheer, and engine or rudder failure.
When to resume
- “Past and clear” = the CPA stays safe even after you restore course and speed.
- Resuming must not create another close-quarters situation (COLREG Rule 8).
- Check it with a trial manoeuvre, then return to the original course gradually.
- Keep monitoring until past and clear — overtaking, crossing or head-on.
The Master on the bridge
In short: at management level you supervise the radar picture and make the decision fast — so you must know the set without thinking.
- Called to the bridge, time is short: look out of the window first, then the radar (12 NM, 6 NM…). Ask the OOW what is happening only when there is no imminent danger. Your arrival should bring calm.
- Know every radar control well: no time wasted operating the set while deciding.
- Never rely on radar alone — integrate all sources: eyes, ears, radar, AIS.
- Officers sometimes delay calling the Master for fear of the Master’s reaction. Make them follow the standing orders (for example a clear rule on fishing vessels).
- A plot is only as good as the person doing it. The weakest officer is the one who does not know what they do not know — and a Master who cannot trust his officers never leaves the bridge.
- Advise OOWs not to give up manual plotting: it is the backup when ARPA fails.
In the simulator and the oral
- Report each encounter as source (radar / AIS / visual) + action taken.
- Oral scenarios start suddenly, with no build-up. Answers are often grey: explain your reasoning. With solid grounds the examiner cannot simply dismiss it.
⚡ Flashcards
Test yourself, one card at a timeQ1Which COLREG rules require you to use radar?
AnswerRules 5, 6, 7, 8 and 19 — look-out, safe speed, risk of collision, action, restricted visibility. Know Rules 2 and 3 too.
Common trapTrap: reciting the text without understanding it — examiners want the meaning, not a parrot.
Q2Rule 6: which extra safe-speed factors apply when you have radar?
Answer“Charlie Carr eats pie no more”: Characteristics of the set · Constraints of range scale · Effect of sea state and weather · Possibility small targets and ice are missed · Number of vessels detected · More exact assessment of visibility.
Common trapTrap: forgetting the six factors for all vessels — “VD Make Little Willies Drip”.
Q3The examiner shows you one plotted position of a target. What do you say?
Answer“Scanty information” (COLREG Rule 7(c)) — ask for more plots. You need at least 3 to see a track.
Common trapTrap: judging course, speed or risk from one or two echoes.
Q4How do you set up the radar for collision avoidance?
AnswerSea-stabilised (speed through the water), relative motion, north-up or course-up. ENC overlay off.
Common trapTrap: head-up (picture spins), or ground-stabilised in a current (wrong aspect).
Q5Heavy traffic. Which three sources give consolidated, optimal target information?
AnswerRadar target tracking (ARPA) + AIS + TT–AIS association. For the avoidance decision, rely on ARPA.
Common trapTrap: manual plotting (too slow), visual look-out, GPS position (does not identify the target).
Q6CPA is inside your limit but TCPA is still long. Is the target dangerous?
AnswerNo immediate danger — watch the TCPA. Dangerous = CPA ≤ CPA limit and TCPA ≤ TCPA limit → decide and act.
Common trapTrap: dropping the target from your watch because TCPA is long.
Q7What makes avoiding action good under COLREG Rule 8?
AnswerEarly, substantial (readily apparent), seamanlike — and it must not create a new close-quarters situation. A few degrees in good time beats 20–30° later.
Common trapTrap: a series of small alterations (1–2°) the other ship cannot see.
Q8Dense fog, narrow channel. Container ship 2.5 NM ahead, CPA 0.8 NM, no VHF reply. Action?
AnswerReduce speed and prepare to take avoiding action. No stand-on vessel in restricted visibility (COLREG Rule 19).
Common trapTrap: altering to port for a vessel forward of the beam (Rule 19(d)), keeping course and speed, or “I’ll call him on VHF”.
Q9What is coordinated action, and how do you check yours before you act?
AnswerBoth ships’ changes move the relative line the same way → CPA grows. Test your plan with the ARPA trial manoeuvre (and a manual plot).
Common trapTrap: assuming the other ship will hold course and speed.
Q10When is your action effective, and when may you resume course and speed?
AnswerCheck until finally past and clear (COLREG Rule 8(d)). Resume only when the CPA stays safe after resuming — check with a trial manoeuvre, then come back gradually.
Common trapTrap: resuming as soon as the target draws aft and creating a new close-quarters situation.
Q11You are the Master, called to the bridge. What do you do first?
AnswerLook out of the window, then the radar. Ask the OOW only when there is no imminent danger. Take the con.
Common trapTrap: going straight to the radar screen, or asking questions while the danger is still building.
Q12A weak, small echo appears close ahead. False echo?
AnswerCommon trapDon’t dismiss it. Assume it is real until proven otherwise: raise the gain to confirm — COLREG Rule 7(c), no assumptions on scanty radar information.
📚 Resources
Books
- A Guide to the Collision Avoidance Rules, A.N. Cockcroft and J.N.F. Lameijer — 7th edition (Butterworth-Heinemann, 2012)
- Radar and ARPA Manual: Radar, AIS and Target Tracking for Marine Radar Users, Alan Bole, Alan Wall, Andy Norris — 3rd edition (Butterworth-Heinemann, 2014)
Regulations
- COLREG Rules 2, 3, 5, 6, 7, 8, 13, 17, 18 and 19 — read the text itself
- IMO MSC.192(79) — performance standards for radar, including target tracking and trial manoeuvre
- MGN 379 (M+F) Amendment 1 — Use of electronic navigational aids — MCA guidance on radar, ARPA, CPA/TCPA alarms and why not to rely on AIS
- MGN 369 (M+F) Amendment 1 — Navigation practices relevant to restricted visibility — safe speed, systematic plotting and Rule 19
- MGN 324 (M+F) Amendment 2 — Use of VHF radio and AIS — why VHF and AIS are no substitute for COLREG action
Exam focus — Malta
Format: online multiple-choice theory test (about 20 questions — eliminate the wrong options first, then look for the keywords), plus an individual simulator exercise where you report each encounter as source + action, with no collisions and no groundings. Typical questions: (1) Which COLREG rules require radar use? → 5, 6, 7, 8, 19 (plus 2 and 3). (2) One plotted point — what is the target doing? → scanty information, COLREG Rule 7(c), more plots needed. (3) Fog, target ahead, CPA 0.8 NM, no VHF reply → reduce speed and prepare to take avoiding action; no stand-on vessel; never to port for a vessel forward of the beam (COLREG Rule 19(d)). (4) Heavy traffic — three sources for consolidated target data → ARPA + AIS + association. (5) When may you resume course? → when past and clear and the CPA stays safe after resuming, checked by trial manoeuvre. What examiners want to hear: early, substantial action that is readily apparent; risk judged on a series of compass bearings and CPA/TCPA, not on one echo; sea-stabilised relative motion for anti-collision; ARPA, not AIS; slow down and create distance — never “I’ll call him on VHF”. In the oral, explain your reasoning.